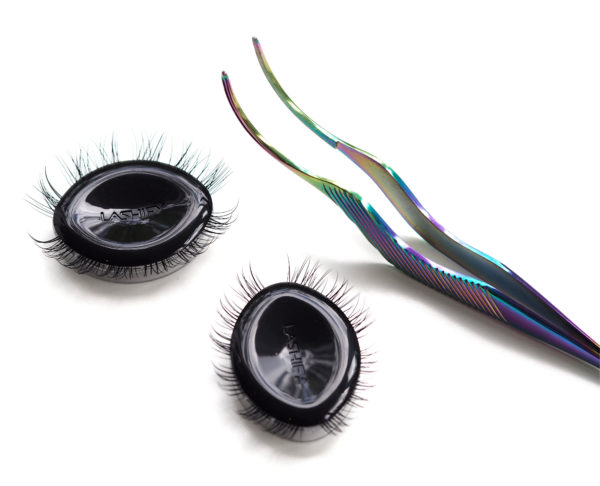
[unpaid/sample/affiliate/ad] Well, I was convinced I was going to be useless at applying the lash extension system – I mean, how could it possibly be easy with those little gone-in-a-sneeze lash whisps and those impossibly unwieldy tweezery-things? Turns out that it truly is a breeze – it did not take more than five minutes, and that was for the first time!

A brief explanation, because you have probably already heard of Lashify, the at home lash extension system. Apparently, it’s gone stellar stateside already and has just arrived here in the UK where it’s probably going to do the same.

Lashify works by applying a bond – to the underside of your lashes. This is as easy as applying mascara but with a much smaller brush. You than have little clusters of lashes so that you don’t have the impossible task of applying individual lashes (who has time?) and I needed three to four clusters per eye.

Find the right angle for you in front of a mirror – I was advised by Lashify ambassador and make up artist, Matin Maulawizada, to open out the Lashify kit with the mirror flat and look down into it, but that proved too weird for me so I angled it a little bit. It’s (thankfully) a magnifying mirror but you can just as easily use a more magnifying one. The key really is to be able to get to the base of the lash to the clusters anchor at the roots. It just kind of happens really but by looking down into the mirror it is more easily exposed. You’ll find the lashes just stick (like Fuzzyfelts) but remove very easily if you need to reposition.

Once you’ve done both lashes (if you’re right handed you will find the right eye much easier than the left – I had to try a couple of times on my left eye to get the lashes exact) you use the wand, with the rubber guards to clamp the lashes, further bonding the extensions to your own lashes.

To remove the lashes (although be prepared, they’re not as long lasting as professional extensions) you need an oil based cleaner although right at the start, you need a non-oil based cleanser to prep your lashes. You can then clean the lashes (with alcohol – surgical spirit perhaps) and put them away to use again.

A few longevity tips – don’t sleep on your face and avoid oils around your lashes when applying skin care. I’m not sure they’d survive a swim either although they should be okay in the shower. There’s an extender liquid to use before bed which is like a clear mascara. I am really, really happy with this Lashify set – mine are the C10s – and will absolutely use them again for a naturally blessed lash look! The grading system for lash sizes are A = Amplify (the most natural look), B = Bold, C = Curl, D = Drama, E = Extreme and F = Fluffy. I’d advise you not to go too shy on the size (which is indicated in mm) – I know I could go up a length or two on C10 and they’d still look great.

There’s a Lashify Facebook page which I’d suggest you have a look at for more tips and tricks on application and longevity, but ultimately, this system is simple and worthwhile if you want an enhanced lash look – they’ll work on any lash length. You remove the bond with an oil cleanser but you also need an oil free cleanser to cleanse your lashes of any residue oils before you re-apply. Prices start at £15 for a set of lashes going up to £115 for the starter set which I would recommend if you’re an absolute beginner. The instruction leaflet is very clear and helpful. I’ll use these I think more for ‘occasion’ than every day but I’m already planning to go large at the weekend. Really, I’m just quite pleased with myself for being able to do it and finding it far easier than I was expecting. The UK Stockist is HERE. There’s a bit more of a visual explanation over on IGTV HERE.


Leave a Reply